Friday, 8 March 2013

Romantic layout

 photo 35ab3000-664b-4275-ad34-eb5dab139352.jpg
Layout created using Grace Taylor Vintage Romance Papers
Pge mated onto boarder and messy double stitched using a machine. The mat behind the photo was also stitched. Details were cut from the paper pack with bird cage being backed onto chipboard to make into an embellishment. Flowers were standard paper roses from local craft store. The lace was applied in 2 strips with blue velvet ribbon covering join.
 photo 6ff0a8e1-245e-4913-93b2-bcc988c141f8.jpg
Corner detail was made by cutting leaf detail lace into individual petals, roses added on top, with definitions cut from K&Co Lifes Journey paper, and the peg was from diy store Wilkinsons

Monday, 18 February 2013

Trade show 2013

Just been to the NEc trade show, and buzzing with new ideas and business expansions. There are so many great new suppliers and products on the market, i just cant help myself but to get involved in it all. So look out soon for my new tutorials, links and online supplies

Saturday, 2 February 2013

Felt Food Tips

Heres a list of tips i discovered while making my felt food, ill keep adding to it as I discover more and hope this helps others too
*Templates- these are easy to create on plain paper by drawing or printing from computer
*Foam Fillers- I use foam offcut pieces as these are cheaper than predone shapes. Simply drawn on size required, and cut out using a bread knife. Any rough edges can be trimmed with scissors, and any gaps filled with wadding
*Stitching- I generally use a straight stitch for details or inner stitching. Outside edges I use a whip stitch. Im not very good at sewing but any unevenness is usually unnoticeable, and adds to handmade charm
*Felt- check the thickness of your felt as loose weave felt will not hold stitches or stand up to playtime
*Thread- I use embroidery thread divided down into 2 strands, this gives strength and colour range to make with your felt

Tortilla Wrap

This is my version of a tortilla wrap, it has wire inside so it can be folded. Vegetables, salad etc can be added into it to make whatever wrap you want
Materials
Templates 6 inch circle and 5.5 inch circle
Cream felt
Cream embroidery thread
Coated wire
Insulation tape
scisscors, pencil, needle and pins
Instructions
1)cut out two 6 inch circles from cream felt
2)tack together with pins around outer edge
3)draw a 5.5 inch circle and straight stitch along this joining pieces together
4)remove pins
5)place wire inside outer flap
6)secure wire into place by whip stitching around outer edge
7)before finishing stitching, trim any excess wire and join together using instulation tape
8)finishing stitching edge to encase remaining wire section
9)losely fold to form tortilla wrap shape

Cherry Lattice Pie

My first piece of felt food. The original idea and tutorial came from American Felt and Craft americanfeltandcraft.wordpress.com/2009/05/21/free-felt-food-pattern-cherry-pie-tutorial-directions-and-templates
but i made it simpler for a 6 inch pie cut into quarters.

Sunday, 27 January 2013

Felt Play Food

For my sons 3rd Birthday I have brought him a play kitchen, but was surprised at the price and quality of the play food. I saw a few interactive pieces like a pizza you could cut up as the parts are Velcro together, but these are often plastic, which didn't look very appealing. Others like wooden were better but very expensive. So while browsing internet I happened to find felt food which looked great, along with a few tutorials. So I wrote a list of what sort of foods I wanted, the colours of felt needed and off I went 1 bag of off cut wadding, sheets of felt, pack of embroidery threads, and some foam pieces all for around £10. Now lets see what I can make with them.....

Tuesday, 20 November 2012

Pudsey Finger Puppets

these were made for Children in Need day

Materials
Pudsey images (cut out)
strips of card
sticky tape
Crayons
Decorations such as sequinns, glue, googly eyes
glue

Instructions
1)Child can colour and decorate image
2)Roll a strip of card around your thumb, and tape together
3)Tape onto back of image, and theres your finger puppet

Diawali Lanterns

Materials
A4 Coloured Card (precut as instructed)
printed rangoli patterns about 2" narrower in width than card
Crayons
Decorations
Double sided tape
String
Hole punch
scissors

Instructions
1) fold colored card in half length way, draw a line about 1" from top. Cut verticle slits from fold to the line drawn about 1" apart. Open up and this forms your lantern
2) allow child to decorate rangoli patterns
3) adhere double sided tape to top and bottom lengths of pattern paper
4) attach lantern top to pattern, allow lantern to dome out along fold and attach bottom part to pattern
5)using hole punch make holes on either side of the top of the lantern and thread string through to form a handle

Tips
i found patterns by doing an internet image search, simple patterns work best
lanterns can also be decorated to add sparkle

Wednesday, 31 October 2012

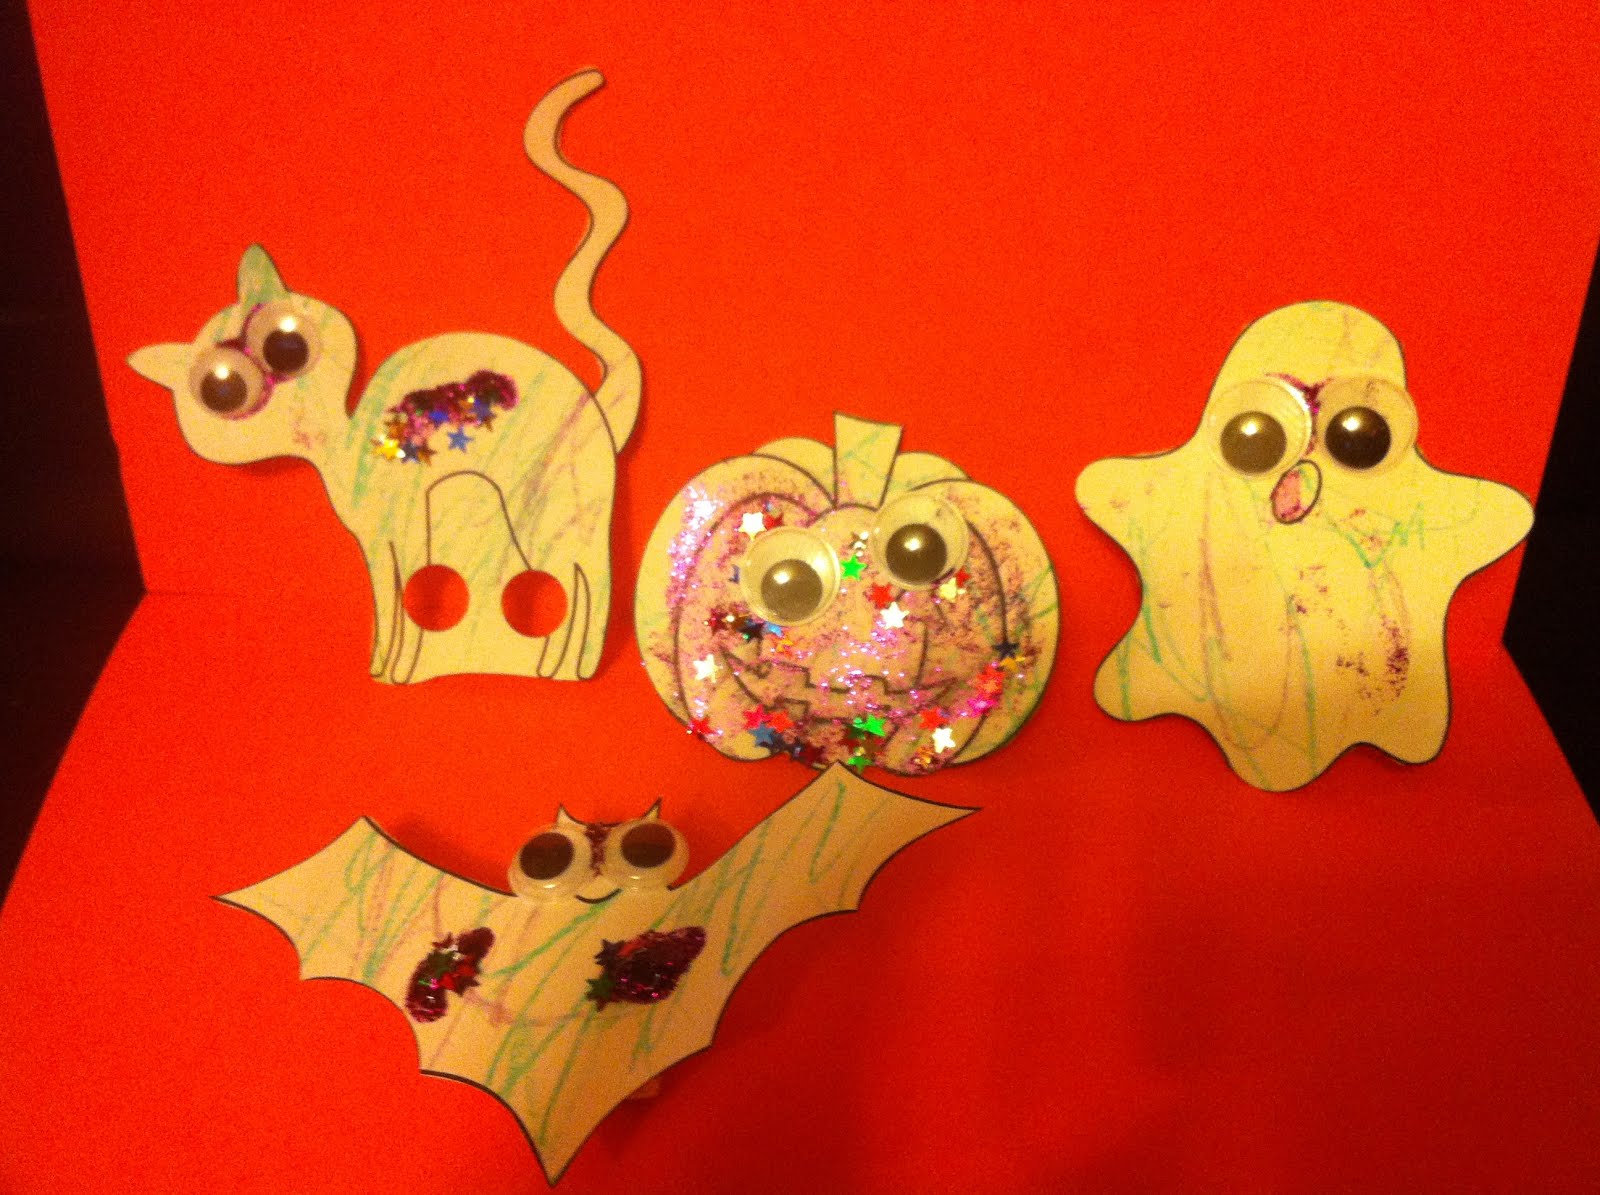
Halloween finger puppets

This is a very quick and simple craft project

Materials
Halloween images (cut out)
strips of card
sticky tape
Crayons
Decorations such as sequinns, glue, googly eyes
glue

Instructions
1)Child can colour and decorate image
2)Roll a strip of card around your thumb, and tape together
3)Tape onto back of image, and theres your finger puppet

Tips
* The images I used were from http://www.firstpalette.com/tool_box/printables/halloween.html

Friday, 26 October 2012

Halloween Window Decoration

Materials Needed
Black card
Acetate
Tissue paper Scraps
Sequins
PVA Glue
Adults scisscors and pencil

Instructions
1) Draw a Halloween shape on back card, keep it simple i used a basic pumpkin
2) Cut out your shape
3) Stick some acetate on the back of the card
4) On the acetate allow child to glue bits of tissue paper all over
5) Turn over to correct side and allow child to glue sequins to decorate
6) Once dry hang on a window and watch the sun shine through

Tips
* some nice templates can be found on http://www.pages01.net/fabriccom/FabricDLHalloweenSilhouettes

Monday, 8 October 2012

Breast Cancer Awareness Week


Tissue Paper Flower Pot
Although preschoolers might be a bit too young to understand, it is still nice to get them involved in awareness weeks. It is also nice to be able to raise awareness within families, or show support to others. So heres something in pinks and incorporating charity logo

Materials
Background paper
card cut into plant pot shape
tissue paper circles
printed logo or bow
Glue
Crayons or decorations

Instructions
1. Decorate the plant pot shape
2. Glue plant pot onto background paper
3. Child can scrunch up tissue paper circles and glue on as flowers
4. Glue logo on front of plant pot

Tips
* If wish can make this into a card to give
* I found it easier to add a spot of glue to where flower needed to go myself and then let child add the tissue paper flower

Tuesday, 2 October 2012

Grandparents day card

Preschool activity very simple and quick to make
Materials needed
A4 card folded into half (to make card blank)
Green and brown paint
Greeting either printed or handwritten
Glue
Black marker pen

Instructions
1. let child make a brown handprint (this will form the tree trunk)
2. let child fingerprint or paint the green leaves
3. once dry tree details and write your 'family tree' in black marker
4. add greeting to bottom of card

Wednesday, 26 September 2012

Tips for Crafting with Preschool

While working with my 2 year old I have picked up a few tips which I hope may be helpful, and will be adding to this as I come across new ones
* Most preschoolers have about 10 minutes attention when making crafts, work with this, try to do all thier parts within this time and worry about drying, or attaching together later as it may be very difficult to get child to keep returning to project

* Preparation. Make sure everything is prepared and laid out ready, the time with the child can be spent making activity instead of trying to get them to wait while you get items

* Remember this is about interacting with the child, developing their creativity, dont worry about perfection. Better to have a piece of art that child enjoyed making thats slanted, off centred or in weird and wonderful colours, than one that got them stressed

* Keep it simple, the child is learning so much while crafting already

* Painting and glueing can be difficult to get child to do in correct spot, create a game of chasing your finger with brush to correct area

*Children can get carried away while crafting, a handprint can pretty soon turn into a big brown splodge. I found if creating a gift create 2 copies, one which you can work on and remove while still 'pretty', and a second which you can swap it with and allow to to continue as much as they want
Monday, 24 September 2012

Treasure Chest

Treasure chest made for my son Quinn who loves Disney Jake and neverland pirates. Made using a chest blank which was then painted in acrylics. the details were hand drawn or printed then added onto chest along with stars created using a punch. Other details such as lock were created with sizzix die, all this was then sprayed with clear varnish. Inside a few sequins were added to look like treasure gems, resulting in a very happy little pirate :-)

Paper roses using 5 petal punch

Remembered from a demo at craft show
Step 1: punch 3 flowers and cut as shown in diagram. First flower is slit from petal edge to centre, second has 1 petal cut away again from centre point, third has 2 petals cut away
Step 2: place glue on each point as indicated by yellow dot
Step 3: roll flower so edge petals over lap and glue together
Step 4: using a cocktail stick roll the single petal into a cone shape, then roll the 2 petal shape around this and glue together. shape this by pinching the cone halfway up and spreading petals to form a centre bud for your rose
Step 5: the flowers that you made in step 3, now dry start curving the petals to shape your flower
Step 6: stack your flowers together with glue, to add the bud into the centre first cut off any excess paper from base of cone shape.
Step 7: once all is dry continue to shape into desired rose, this can then be inked or sprayed

Friday, 21 September 2012

Preschool Lion Mask

Heres my first tester for preschool crafting sessions, as practised on my 2yr old
Materials Needed
card cut into shape of lion face with eyes cut out and holes added to sides for attaching string to later (i drew round small plate for main face and then added a semi circle using a cup for the chin)
Brown card or felt cut into semi circle for nose, ovals for ears, and strips for whiskars;
Yellow card cut into triangles for front mane;
tissue paper in orange and yellow;
yellow paint; glue; string; painting equipment

Instructions
1. paint mask yellow
2. glue on nose, ears, whiskers and yellow triangles (mane)
3. on reverse glue on strips of tissue paper from the mane
4. once dry tie string to make into a mask

Tips
when painting in a single colour dont worry about letting dry between glueing, children of this age are not patient and rarely return back to a project.
make a game of chasing your finger with paintbrush to get them to paint all areas of mask, or to glue in correct area

">

Preschool Family Crafting

I have been asked to help with my local playgroup to design a few family crafting sessions. These have been very different to do as the materials and techniques are very limited for preschoolers. Also as i realise with my own son Quinn the attention span is about 10 minutes, so quick and simple seems to work best. Wish me luck and i'll keep posts updated with all the latest designs with instructions

All play no posts ;-)

sorry i havent been posting for a while, but i been busy learning new skills. i have been completing a number of pages created by the lovely Karen of Total Papercrafts as you can see in this album link below. Her work is fab, and i have learnt so much, even inspired me to use up all my scraps too
">

Monday, 28 May 2012

Sunshine photo shoot

"> my youngest son never stands still so i thought i would just take random shots of him at play. these were taken using dslr but simply on auto or portrait setting, taking as many as i could while laying down low on grass to fully capture the childhood effect and then just convert into black and white using standard editing tool

Thursday, 15 March 2012

A few more cards this month

March is certainly a busy month, so heres a few more cards i've made
Just made an old favourite, elegant boot card templates by ribbonboxElegant boot template by ribbonbox