Tuesday, 20 November 2012

Pudsey Finger Puppets

these were made for Children in Need day

Materials
Pudsey images (cut out)
strips of card
sticky tape
Crayons
Decorations such as sequinns, glue, googly eyes
glue

Instructions
1)Child can colour and decorate image
2)Roll a strip of card around your thumb, and tape together
3)Tape onto back of image, and theres your finger puppet

Diawali Lanterns

Materials
A4 Coloured Card (precut as instructed)
printed rangoli patterns about 2" narrower in width than card
Crayons
Decorations
Double sided tape
String
Hole punch
scissors

Instructions
1) fold colored card in half length way, draw a line about 1" from top. Cut verticle slits from fold to the line drawn about 1" apart. Open up and this forms your lantern
2) allow child to decorate rangoli patterns
3) adhere double sided tape to top and bottom lengths of pattern paper
4) attach lantern top to pattern, allow lantern to dome out along fold and attach bottom part to pattern
5)using hole punch make holes on either side of the top of the lantern and thread string through to form a handle

Tips
i found patterns by doing an internet image search, simple patterns work best
lanterns can also be decorated to add sparkle

Wednesday, 31 October 2012

Halloween finger puppets

This is a very quick and simple craft project

Materials
Halloween images (cut out)
strips of card
sticky tape
Crayons
Decorations such as sequinns, glue, googly eyes
glue

Instructions
1)Child can colour and decorate image
2)Roll a strip of card around your thumb, and tape together
3)Tape onto back of image, and theres your finger puppet

Tips
* The images I used were from http://www.firstpalette.com/tool_box/printables/halloween.html

Friday, 26 October 2012

Halloween Window Decoration

Materials Needed
Black card
Acetate
Tissue paper Scraps
Sequins
PVA Glue
Adults scisscors and pencil

Instructions
1) Draw a Halloween shape on back card, keep it simple i used a basic pumpkin
2) Cut out your shape
3) Stick some acetate on the back of the card
4) On the acetate allow child to glue bits of tissue paper all over
5) Turn over to correct side and allow child to glue sequins to decorate
6) Once dry hang on a window and watch the sun shine through

Tips
* some nice templates can be found on http://www.pages01.net/fabriccom/FabricDLHalloweenSilhouettes

Monday, 8 October 2012

Breast Cancer Awareness Week


Tissue Paper Flower Pot
Although preschoolers might be a bit too young to understand, it is still nice to get them involved in awareness weeks. It is also nice to be able to raise awareness within families, or show support to others. So heres something in pinks and incorporating charity logo

Materials
Background paper
card cut into plant pot shape
tissue paper circles
printed logo or bow
Glue
Crayons or decorations

Instructions
1. Decorate the plant pot shape
2. Glue plant pot onto background paper
3. Child can scrunch up tissue paper circles and glue on as flowers
4. Glue logo on front of plant pot

Tips
* If wish can make this into a card to give
* I found it easier to add a spot of glue to where flower needed to go myself and then let child add the tissue paper flower

Tuesday, 2 October 2012

Grandparents day card

Preschool activity very simple and quick to make
Materials needed
A4 card folded into half (to make card blank)
Green and brown paint
Greeting either printed or handwritten
Glue
Black marker pen

Instructions
1. let child make a brown handprint (this will form the tree trunk)
2. let child fingerprint or paint the green leaves
3. once dry tree details and write your 'family tree' in black marker
4. add greeting to bottom of card

Wednesday, 26 September 2012

Tips for Crafting with Preschool

While working with my 2 year old I have picked up a few tips which I hope may be helpful, and will be adding to this as I come across new ones
* Most preschoolers have about 10 minutes attention when making crafts, work with this, try to do all thier parts within this time and worry about drying, or attaching together later as it may be very difficult to get child to keep returning to project

* Preparation. Make sure everything is prepared and laid out ready, the time with the child can be spent making activity instead of trying to get them to wait while you get items

* Remember this is about interacting with the child, developing their creativity, dont worry about perfection. Better to have a piece of art that child enjoyed making thats slanted, off centred or in weird and wonderful colours, than one that got them stressed

* Keep it simple, the child is learning so much while crafting already

* Painting and glueing can be difficult to get child to do in correct spot, create a game of chasing your finger with brush to correct area

*Children can get carried away while crafting, a handprint can pretty soon turn into a big brown splodge. I found if creating a gift create 2 copies, one which you can work on and remove while still 'pretty', and a second which you can swap it with and allow to to continue as much as they want

Monday, 24 September 2012

Treasure Chest

Treasure chest made for my son Quinn who loves Disney Jake and neverland pirates. Made using a chest blank which was then painted in acrylics. the details were hand drawn or printed then added onto chest along with stars created using a punch. Other details such as lock were created with sizzix die, all this was then sprayed with clear varnish. Inside a few sequins were added to look like treasure gems, resulting in a very happy little pirate :-)

Paper roses using 5 petal punch

Remembered from a demo at craft show
Step 1: punch 3 flowers and cut as shown in diagram. First flower is slit from petal edge to centre, second has 1 petal cut away again from centre point, third has 2 petals cut away
Step 2: place glue on each point as indicated by yellow dot
Step 3: roll flower so edge petals over lap and glue together
Step 4: using a cocktail stick roll the single petal into a cone shape, then roll the 2 petal shape around this and glue together. shape this by pinching the cone halfway up and spreading petals to form a centre bud for your rose
Step 5: the flowers that you made in step 3, now dry start curving the petals to shape your flower
Step 6: stack your flowers together with glue, to add the bud into the centre first cut off any excess paper from base of cone shape.
Step 7: once all is dry continue to shape into desired rose, this can then be inked or sprayed

Friday, 21 September 2012

Preschool Lion Mask

Heres my first tester for preschool crafting sessions, as practised on my 2yr old
Materials Needed
card cut into shape of lion face with eyes cut out and holes added to sides for attaching string to later (i drew round small plate for main face and then added a semi circle using a cup for the chin)
Brown card or felt cut into semi circle for nose, ovals for ears, and strips for whiskars;
Yellow card cut into triangles for front mane;
tissue paper in orange and yellow;
yellow paint; glue; string; painting equipment

Instructions
1. paint mask yellow
2. glue on nose, ears, whiskers and yellow triangles (mane)
3. on reverse glue on strips of tissue paper from the mane
4. once dry tie string to make into a mask

Tips
when painting in a single colour dont worry about letting dry between glueing, children of this age are not patient and rarely return back to a project.
make a game of chasing your finger with paintbrush to get them to paint all areas of mask, or to glue in correct area

">

Preschool Family Crafting

I have been asked to help with my local playgroup to design a few family crafting sessions. These have been very different to do as the materials and techniques are very limited for preschoolers. Also as i realise with my own son Quinn the attention span is about 10 minutes, so quick and simple seems to work best. Wish me luck and i'll keep posts updated with all the latest designs with instructions

All play no posts ;-)

sorry i havent been posting for a while, but i been busy learning new skills. i have been completing a number of pages created by the lovely Karen of Total Papercrafts as you can see in this album link below. Her work is fab, and i have learnt so much, even inspired me to use up all my scraps too
">

Monday, 28 May 2012

Sunshine photo shoot

"> my youngest son never stands still so i thought i would just take random shots of him at play. these were taken using dslr but simply on auto or portrait setting, taking as many as i could while laying down low on grass to fully capture the childhood effect and then just convert into black and white using standard editing tool

Thursday, 15 March 2012

A few more cards this month

March is certainly a busy month, so heres a few more cards i've made
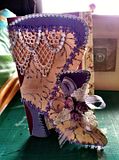
Just made an old favourite, elegant boot card templates by ribbonboxElegant boot template by ribbonbox

Birthdays cards

Beth loved her bag card and of course there was also the card i made for Quinn whos mad on mickey mouse

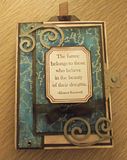
Then finally the gift box i made for Ian, adapted on a project from Craft Stamper. The box was originally tied nicely with his favourite chocolates inside, but i forgot to take picture until after he'd eaten them. was nice to be able to add tag inside to as a gift voucher for a nice birthday meal that i had booked
birthday gift boxbirthday gift box inside

Tuesday, 21 February 2012

Pauls Boutique style card bag

Well heres my latest project, designed for Beth's 13th Birthday next week. The tutorial for it is shown on post below and on youtube, any further instructions or information is available by emailing me or leaving a comment

The inspiration for this came from finding a zebra print piece of felt in a craft store, it instantly sparked what card to make for my Pauls boutique obsessed daughter. It was really simple to make, the only time consuming parts came when waiting for fabric glue to dry between pieces.
Well i hope you like this and would love to get some feedback

Pauls Boutique style card bag tutorial

All the fun of the craft fair

Yesterday I spent the day at Birmingham NEC Craft Hobby and Stitch International. Was lovely to see all the new products, and demonstrations. I gathered a few contacts and hopefully will have an internet based shop up and running in next few months.
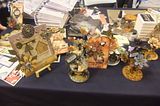
As always i'm drawn to the lovely displays from sizzix
PhotobucketPhotobucketPhotobucketPhotobucket
these from craft inspirations were also very inspiring and a great demonstration on new spellbinder designs

Photobucket

Thursday, 16 February 2012

Fabric Flower Alteration Tutorial

Large Scale Layout


While wondering round ikea I found a large square picture frame (Ribba) measuring 20" square with a mount included of 11.5" square. It was perfect as also had a deep shadow box frame ideal for oversized embellishments.
First i covered the mount with old music sheets, which i lightly painted with gesso to produce a more unified appearance. both the inside and outside edges were inked with Distress inkpad 'old paper' and 'tea dye' applied with a blending foam pad.

For inside the mount I used a sheet of Scrapadapery 'Robert Burns', i lightly inked the edges of a 8x10" photo with black ink, and mounted on a sheet of cardstock inked with brown.
Embellishments. the stamped flourishes, Autumn Leaves flourishes 2, were stamped on acetate with black stazon ink, this allowed for movement and any mistakes.
The felt edging strip was from prima, originally in white, proved a little difficult to ink so i ended up colouring in with a brown permanent marker.
The leaves were cut using Tim Holtz distressed flowers sizzix die, and inked brown. the small paper flowers were just brought from local market, sold on a bunch with individual buds cut off.

Large flowers were fabric flowers brought from poundshop in white, sprayed, stamped with script pattern using versamark fine brown, edges inked in brown, and crystals added to centres (see my colouring flowers demo above)

Valentines day project

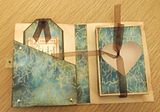
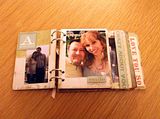
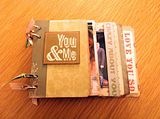
I never really been much in the way of lovey dovey stuff, but this year was different. I wanted to let the man in my life know just special he was as not only was it valentines, but also our first anniversary. We have done so much since our first date together last year, so what a better way than to do a mini book celebrating all those wonderful times. This was really difficult to do a masculine theme, as I usually do kiddy, flowers or bling, so although it was quite plain, it did get the message across of how much I love him.
valentines mini bookminibook pg1
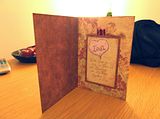
and he got a card, with a secret tag hidden inside with a special message
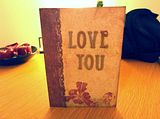
valentinesvalentines inside

Sunday, 29 January 2012

A bit of me


This weeks challenge on UKScrappers was all about scrapping yourself, something which i usually find very hard, but with a bit of a giggle with my crafting mate Wendy, along with Red Bull and chocolate I finally produced this

This was using scenic route 'lynden easter' papers and stickers from a very old kit, back porch memory journalling stamp, prima flowers, beads and micro crystals (applied individually by hand)
Based on layout in Prima Idea's book

Crafting resolutions


My new years resolution was to craft every Thursday, a little bit of me time. To begin things gently I based my projects on kits from my existing stash, and starting scrap-lifting a few pages. Now only does this get the creative juices flowing again, but also picks up new techniques.

here's a few of the things I've done so far

Return of the crafter

Well as you can probably gather i have been away from blogging for a while now, due to huge changes in my family life. I am a single mum and was a bit too busy with a young baby to even begin the search for my mojo :-)
Now Quinn is nearly 2yrs old, Connor 10yrs and Bethany nearly 13yrs, can you believe how old i feel, so i have finally got some time for myself. also with a lovely guy on the scene whom i have been with for past year, the mojo and inspiration is defiantly returning