Friday, 8 March 2013

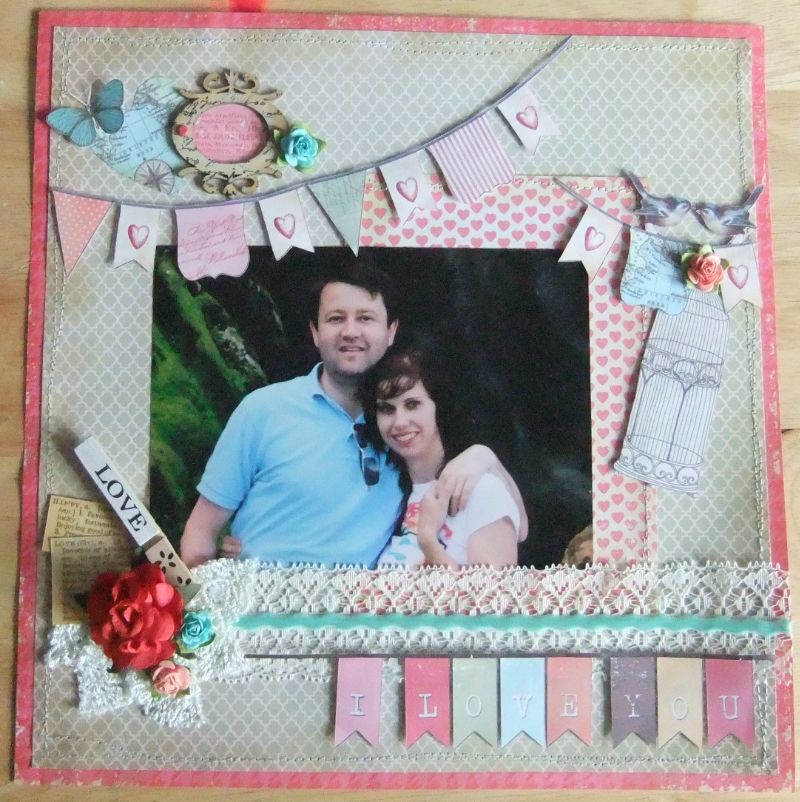
Romantic layout

 photo 35ab3000-664b-4275-ad34-eb5dab139352.jpg
Layout created using Grace Taylor Vintage Romance Papers
Pge mated onto boarder and messy double stitched using a machine. The mat behind the photo was also stitched. Details were cut from the paper pack with bird cage being backed onto chipboard to make into an embellishment. Flowers were standard paper roses from local craft store. The lace was applied in 2 strips with blue velvet ribbon covering join.
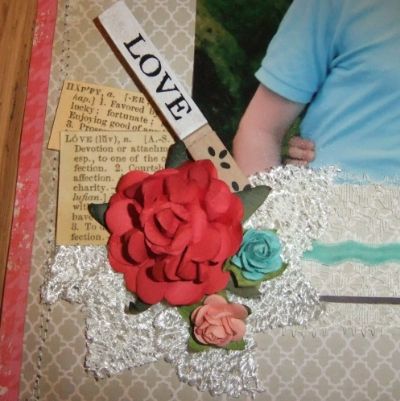
 photo 6ff0a8e1-245e-4913-93b2-bcc988c141f8.jpg
Corner detail was made by cutting leaf detail lace into individual petals, roses added on top, with definitions cut from K&Co Lifes Journey paper, and the peg was from diy store Wilkinsons

Monday, 18 February 2013

Trade show 2013

Just been to the NEc trade show, and buzzing with new ideas and business expansions. There are so many great new suppliers and products on the market, i just cant help myself but to get involved in it all. So look out soon for my new tutorials, links and online supplies

Saturday, 2 February 2013

Felt Food Tips

Heres a list of tips i discovered while making my felt food, ill keep adding to it as I discover more and hope this helps others too
*Templates- these are easy to create on plain paper by drawing or printing from computer
*Foam Fillers- I use foam offcut pieces as these are cheaper than predone shapes. Simply drawn on size required, and cut out using a bread knife. Any rough edges can be trimmed with scissors, and any gaps filled with wadding
*Stitching- I generally use a straight stitch for details or inner stitching. Outside edges I use a whip stitch. Im not very good at sewing but any unevenness is usually unnoticeable, and adds to handmade charm
*Felt- check the thickness of your felt as loose weave felt will not hold stitches or stand up to playtime
*Thread- I use embroidery thread divided down into 2 strands, this gives strength and colour range to make with your felt

Tortilla Wrap

This is my version of a tortilla wrap, it has wire inside so it can be folded. Vegetables, salad etc can be added into it to make whatever wrap you want
Materials
Templates 6 inch circle and 5.5 inch circle
Cream felt
Cream embroidery thread
Coated wire
Insulation tape
scisscors, pencil, needle and pins
Instructions
1)cut out two 6 inch circles from cream felt
2)tack together with pins around outer edge
3)draw a 5.5 inch circle and straight stitch along this joining pieces together
4)remove pins
5)place wire inside outer flap
6)secure wire into place by whip stitching around outer edge
7)before finishing stitching, trim any excess wire and join together using instulation tape
8)finishing stitching edge to encase remaining wire section
9)losely fold to form tortilla wrap shape

Cherry Lattice Pie

My first piece of felt food. The original idea and tutorial came from American Felt and Craft americanfeltandcraft.wordpress.com/2009/05/21/free-felt-food-pattern-cherry-pie-tutorial-directions-and-templates
but i made it simpler for a 6 inch pie cut into quarters.

Sunday, 27 January 2013

Felt Play Food

For my sons 3rd Birthday I have brought him a play kitchen, but was surprised at the price and quality of the play food. I saw a few interactive pieces like a pizza you could cut up as the parts are Velcro together, but these are often plastic, which didn't look very appealing. Others like wooden were better but very expensive. So while browsing internet I happened to find felt food which looked great, along with a few tutorials. So I wrote a list of what sort of foods I wanted, the colours of felt needed and off I went 1 bag of off cut wadding, sheets of felt, pack of embroidery threads, and some foam pieces all for around £10. Now lets see what I can make with them.....